Rifleman Drills
Overview
If you’ve read the page on Group Organisation then you’ll understand how all of the pieces of the puzzle fit together, and how we structure our infantry elements. In this section, we’ll deep-dive into the essentials of the standard infantry rifleman - focussing on the core skills and responsibilities required to perform this role effectively. Your ability to perform as a basic rifleman is the foundation on which we build additional skills to make you an effective asset in the field.
While we often employ different types of combined arms elements, like tanks; helicopters; jets and more, the core focus of our gameplay is always around that of the infantry soldier - and knowing how to perform this role will aid you in being able to better utilise heavier assets.

Communications - The basics
Communications are generally the cornerstone of the ArmA 3 milsim experience. It’s something that is essential in order keep thing running smoothly, and something that is quickly noticeable when it’s not being implemented correctly.
Passing down the line
We operate a principle of ‘passing down the line’ - what this means, quite simply, is that there are certain commands that, once heard, are repeated aloud by every member of the section to confirm that they have heard them, and also to echo it for other members of the section that may not have heard it. The idea behind this approach is to reduce the amount of ‘noise’ on the section-level radio, keeping it clear for essential traffic.
Radio Discipline
Each infantry section will have an assigned frequency, and all team members will carry a personal radio. This allows you to communicate with your fellow team members at a range greater than the maximum achievable using local voice. This radio net should be kept clear of idle chit-chat, and used only to convey essential information like:
- The location and direction of contact
- The medical status of a fellow team member (if someone is unconscious or dead)
- The operability of assets belonging to the section (for example, an offroad vehicle)
When considering sending a radio message, take a second to formulate your message, and consider the following principle:
Accuracy - Are you sure what you're going to say? Is that information accurate? Brevity - Don't ramble on the radio, how can you convey this information effectively in the shortest amount of time? Clarity - Is the purpose of my message clear? Will my team members understand what I mean?
Commands
General Commands
As a rifleman, you must be familiar with some of the basic commands that could be issued to you by your team leader. In this section of the guide we’ll cover the most common terms, and what they mean.
Break, Break
Upon hearing this command you should cease talking immediately. You’ll often hear this command issued in the moments before something important is said, or is about to happen. Examples of such events include a helicopter coming into land where you are expected to disembark, or at the start of a briefing.
Sound Off
This command is used by the squad leader to assess the current fighting strength of the section, and to ascertain if any members have been KIA. As we use the DUI - Squad Radar you’ll see a list of your team members similar to the following:

Simply say your name down the radio in a ‘mexican wave’ format, descending down the list in order. If the person before you doesn’t answer, it’s possible that they are either unconscious or dead - give a three second pause to allow them to answer, and then if nothing has been said, say your name.
Emergency Commands
Man Down
Use this command to make your fellow team members aware that someone has gone down. For the sake of preventing confusion, only call this out for members of YOUR section - the members of the other sections are responsible for the welfare of their own troops.
N-D
Short for ‘Negative Discharge’, this command is issued when you have anciently discharged your weapon unintentionally. It’s important to let your fellow team members know that the gunfire they heard was accidental, otherwise they may assume that they are under contact and respond accordingly.
Bad Nade
Any experienced player knows that sometimes ArmA’s grenades can be a little funky - colliding with objects and landing directly at your feet instead of going through that window. If such a mishap occurs, and a grenade ends up in a place where it is now a danger to allies, shout ‘Bad Nade’ and get clear. If you’re in the unfortunate position of hearing this command being issued - immediately adopt the prone position and wait for the explosion.
Movement Commands
The following commands will be issued by the squad leader and should be repeated using the ‘passing down the line’ principle that was discussed earlier.
Hold
Stop moving and take a knee. If not in contact, remain in formation.
Prepare to move
Get ready to start moving in formation. If kneeling, stand up.
Move
Start moving

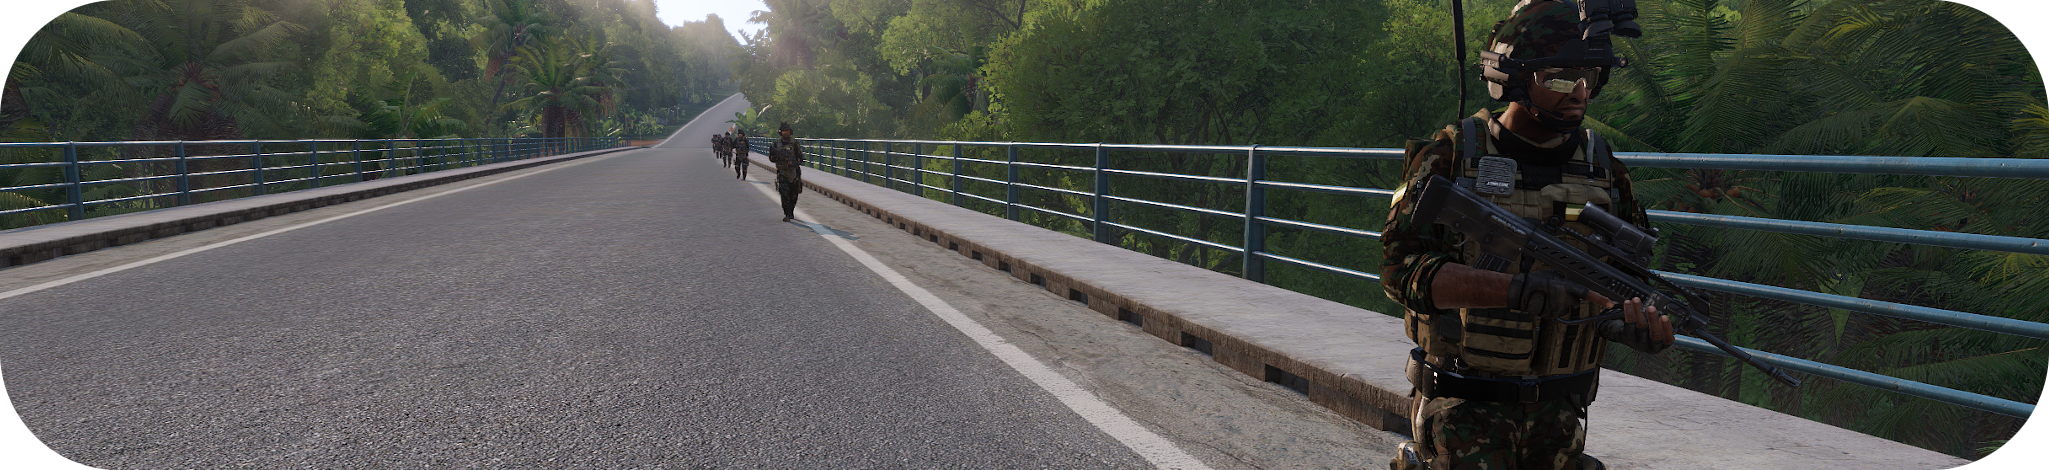
Formations
When operating as part of a standard rifle section, there are a few formations that you need to be aware of. Formations allow us to control spacing and firepower depending on the situation, with some of the formations being used in a defensive capacity, and others being used in an offensive capacity.
Baseline
A baseline formation is a line running perpendicular to the line of advance.
Advantages
- High frontal firepower
- Relatively easy to form
Disadvantages
- All firepower is facing in one direction
- Doesn’t perform well when reacting to contacts at the side or rear

Column
This formation is akin to a simple ‘follow the leader’, with team members following the point man one after another.
Advantages
- Very simple.
- The direction for formation is heading is clear.
- Extremely effective for responding to contact from the sides.
Disadvantages
- Poor front and rear firepower.
- Can be difficult to maintain adequate spacing.
Staggered Column
This formation is an alternative version of the standard column. It involves two teams travelling in parallel columns slightly offset from each other.
Advantages
- Increased front and rear firepower when compared to a regular column.
- Relatively easy to maintain decent spacing.
Disadvantages
- The leaders of both of the columns must communicate to ensure their paths stay parallel.
- Increased likelihood to trigger mines and IEDs as a wider surface area is being covered.

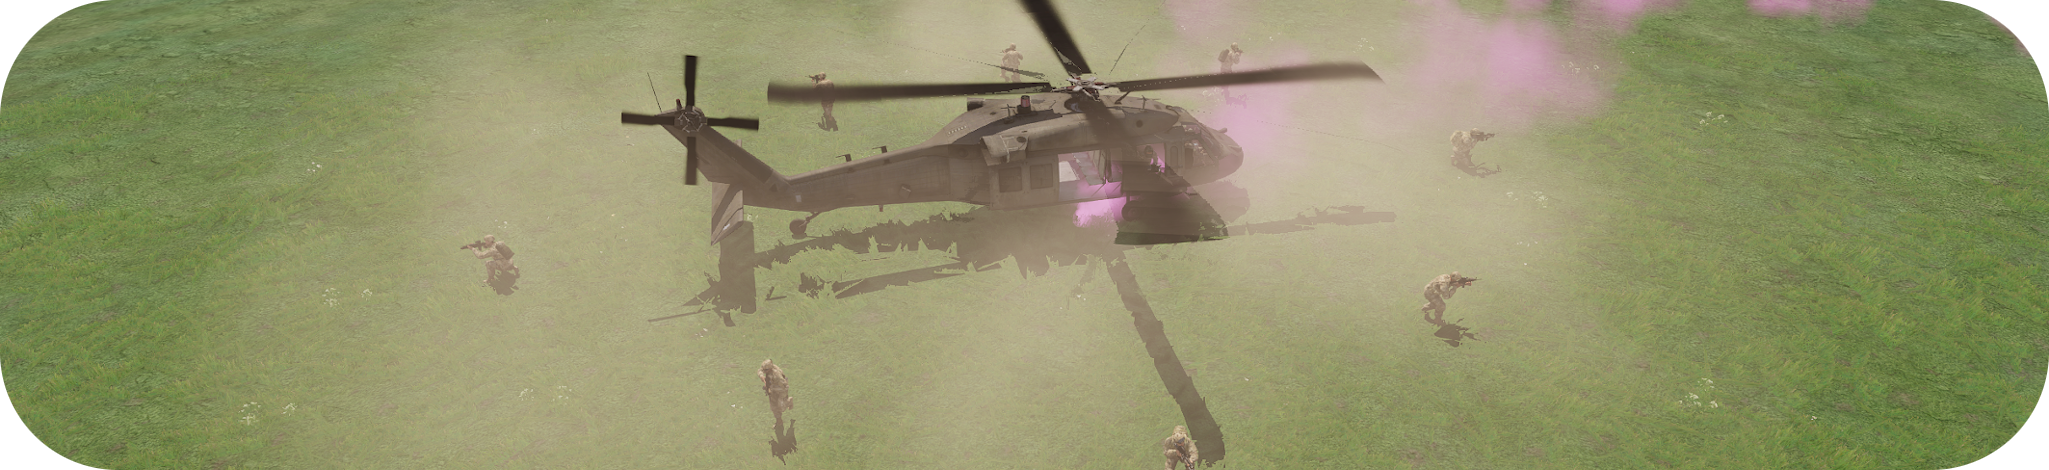
All Round Defence
The aptly named ‘All Round Defence’, also referred to as an ARD, is a defensive formation with the intent to cover all possible angles of fire - and often used to protect an asset in the centre of the formation. This is the go-to formation for troops disembarking from a vehicle.
Advantages
- Nearly all angles of attack covered.
- Can be used to gain situational awareness.
Disadvantages
- As troops are spread out covering a number of angles, the amount of firepower focussed on any one direction is minimal.
- A more manpower heavy formation due to the number of angles to be covered.
Arrowhead
An arrowhead formation involves teams forming a triangular shape to either side of the point man.
Advantages
- Provides strong firepower in all directions
Disadvantages
- Can be difficult to maintain correct spacing
- Requires large open space to be effective, otherwise units can end up being funnelled.

Operational Restrictions
For this section of the guide we’re going to dive into a little bit more detail about some of the gameplay and roleplaying restrictions that may be present in operations for the purposes of immersion. While we’re not exactly a roleplay-heavy community, without some artificial control measures, certain gameplay mechanics lose any effect. Take the presence of civilians as an example - If we’re able to just shoot, detain or otherwise mistreat a local civilian presence with impunity, they become useless as a gameplay mechanic. In addition to this, we’re interested in creating an environment that sets itself apart from a regular ‘run and gun’ scenario with uncontrolled explosions going off left and right.
Rules of Engagement
The first of these control measure is the Rules of Engagement (or RoE).
“Rules of engagement (ROE) are the internal rules or directives among military forces … They provide authorization for and/or limits on, among other things, the use of force and the employment of certain specific capabilities.” - Wikipedia - Rules of Engagement
In layman terms, these rules outline what we can and cannot do with regards to the use of force. They define who the combatants are, and on what level we are allowed to engage them. Usually the RoE will be briefed to the platoon at the start of the event, however, if for any reason this is not done then you are to conform to the standard RoE as outlined below:
- Do not fire upon unarmed combatants.
- Ensure that all targets have been positively identified as enemy (PID).
- Do not use explosives or other indirect fire methods (grenades, launchers, mortar, artillery) in an area with a high likelihood of civilian presence.
- If the enemy haven’t spotted you - request permission from your team leader before opening fire.
Positive Identification (PID)
Identifying unknown forces
Positive identification is the process of confirming that the contact you’ve spotted is in fact a hostile force, and not:
- Armed or unarmed civilians.
- Friendly forces.
- Other third party armed forces such as PMCs or UN soldiers.
Always confirm who you’re shooting at before you pull the trigger, and if in any doubt… Do. Not. Fire.. If you’ve spotted what you believe to be hostile forces, alert your section or fireteam leader without delay. If you’re having trouble identifying friend from foe, you can use some of the following resources:
- Open your map and look at the current location of friendly forces using Blue Force Tracking (BFT).
- Ask for a second opinion from a team member.
- Refer to your mission brief as to what additional forces might be the area, and how they can be identified.
Preventing friendly fire
One of the methods used to identify enemy forces, is by the weapons and equipment that they are carrying. We have a strict rule around picking up enemy weapons and equipment, and it’s a simple one - don’t do it. If you find yourself running low on ammunition, ask your team leader for a resupply, and they’ll be happy to arrange it for you. The reasoning behind this rule, is that by wearing/using enemy equipment, you could be misidentified as a member of the opposition and killed by friendly forces.
On occasion, you may be left with no choice. Sometimes you might find yourself in a last stand fight to the death situation - and in these situations the acquisition of enemy weapons can be justified - but it should absolutely be a last resort.

Civilian Interactions
At the start of an operation, you should receive information on the state of civilian presence in the Area of Operations (AO). When operating in civilian areas, you should consider the following:
- We have no mandate to arrest civilians going about their business - You shouldn’t go around simply handcuffing every civilian that you can, because you can.
- We have no mandate to enter civilian property unless militarily necessary - Unless you have reason to believe that a civilian building is being used by the enemy, and currently poses a danger to yourself and others, you shouldn’t just kick the door down of every single property that you see.
Police & paramilitary forces
On the subject of civilians, it’s worth noting the distinction between a military force, and an armed civilian force. During operations you may stumble across civilian law enforcement, who are likely to be armed. Unless they fire upon you, law enforcement are not legitimate combatants - and therefore no military action can be taken against them. In the event that the police have been brought under the control of the regular military, they are now no longer a civilian organisation, but a paramilitary one - this makes them legitimate military combatants. This can be a useful thing to clarify with your team leader.
The Regulation also states that “[t]he civilian police are not part of the belligerent forces, as long as they do not take part in the fighting and are not integrated into the armed forces - IHL - Practice Relating to Rule 3. Definition of Combatants
Prisoners of War (PoWs)
You may come across enemy forces who have either surrendered, or are wounded to the point of being unconscious. If this happens you should:
- Place them under arrest.
- Disarm them, removing any weapons and combat gear (but not clothing).
- Treat their wounds and provide first aid (but prioritise friendly forces).
- Arrange to have them extracted for interrogation.
POWs must be treated humanely in all circumstances. They are protected against any act of violence, as well as against intimidation, insults, and public curiosity. - Red Cross - Prisoners of War

Battle Drills
Winning the firefight
When we find ourselves in a firefight, the priority is to seize the initiative and gain control over the situation. To do this, we can use the ARD principle:
- Alert
- React
- Decision
Alert
Let your team members know that the fight is kicking off, this is essential as they will need to start scanning the area for additional contact, and consider where they can move for cover and concealment. If you’re unsure where the contact is coming from, you can just say:
Contact!
If you have the information to hand, then you can give a slightly more detailed contact report:
Contact! Infantry! 200 Metres! North!
The key is that this needs to be snappy. Don’t waste everyone’s time trying to figure out this information, the reaction stage is far more critical.
React
When you find yourself in contact, how you react in those first few seconds is critical. An effective response can be the difference between regaining control and winning the firefight, or having your entire section wiped out. When the bullets start flying, remember:
- Get to cover - Break formation and find some solid cover. If you are caught out in the open, go prone.
- Return fire - Lay down fire on known or suspected enemy positions.
- Check for causalities - Check the status of your battle buddy.
The absolute priority is always to win the firefight - don’t get tunnel vision attempting to treat a wounded team member. Patching up your injured is nothing but a waste of bandages if your position is quickly overrun.
Decision
At this point in the firefight, a decision will need to be made by the team leader whether to:
- Stand and fight - Hold position and engage hostile forces.
- Close to contact - Attempt to close distance with the enemy in order to more effectively engage them. This should be done using the Bounding Overwatch demonstrated further up in the guide.
- Break Contact - If the team leader feels that this is not a fight that they are able to deal with, they have the option to attempt to break contact with the enemy.
Fire Control Orders (FCOs)
During a firefight, a team leader might issue FCOs in order to control the level of ammunition expenditure and adjust to the perceived level of threat. You could expect to hear some of the following:
Rapid Fire!
This correlates to one round every approximately three seconds. This is the fastest rate of suppressive fire and should be your go-to if a fire-rate is not specified. While an individual rifleman firing once every three seconds is an almost insignificant fire output, a whole section doing it in unison can put a fairly heavy amount of pressure on enemy positions.
Deliberate Fire!
One round every six seconds. You’ll usually hear this issued at the transitional phase when a firefight is winding down, with a significant chunk of the enemy either dead or injured.
Watch and Shoot!
Cease suppression. Only shoot when you have eyes-on a hostile. You’ll find this used at points where the firefight is at it’s calmest and the contact has been more or less successfully dealt with.
Medical Protocol
When a team member goes down, there can be a strong compulsion to stop what you’re doing and provide assistance. However, a number of people jumping on the casualty can be more detrimental than it is helpful - which is why we have the following doctrine for what to do when someone is wounded:
- Report who is down, and where they are
- Only one person needs to be checking the casualty. If you are not that person, provide smoke and covering fire.
- If possible, and without compromising the rest of the team, attempt to move the casualty to a safer location.
- If the medic is available - leave the casualty for them to deal with.
- If the medic is not available - Begin providing first aid and continue until the medic is in a position to take over.
- Once the medic is present, they have total authority over any casualties. If they ask you to leave - you leave. If they ask you to help - you help.

Urban Combat
An urban area can generally be considered to be anywhere with a medium to high density of buildings. These environments are generally very beneficial to infantry teams, especially when facing off against heavier armoured assets, often by providing substantial amounts of hard cover, and limited sight lines. Despite this, they can offer some significant hazards as well and must be navigated with care. Here we’ll explore some of the basic concepts for surviving in built up areas.
Basic Concepts
- Walk. Don’t run. - Always breach a building walking with your weapon raised. Running through a doorway in an uncleared building will not give you sufficient time in order to stop and raise your weapon to react to a threat.
- Consider the RoE - You should know from your briefing if the area you are in is red light, or green light. If it’s red-light consider using non lethal grenades like flashbangs. If it’s green-light, consider the use of fragmentation grenades.
- Stick to the wall - Keeping your back against the wall gives you one less angle to worry about - however remember to exercise caution when crossing external-facing windows.
- Move from cover to cover - Urban areas contain an abundance of hard cover. Take advantage - don’t sit out in the open if there is no need to do so.
- Minimal exposure - Seek to utilise the stance system. Ensure that when looking around corners, you have the smallest possible footprint for any observing hostile forces.
Tactics
Crossing alleyways
Alleyways can make excellent kill funnels if being watched by heavy calibre weaponry. Always ensure that when crossing over an open space, a cover element is watching the risk areas in order to prevent any nasty suprises when the moving element are out in the open.

Breaching & Entrance
While building clearing can be completed by a buddy team, full clearing procedure should involve at least one fireteam split into two sub elements:
- The clearing team - This is the team that will actually be entering the building.
- The cover team - This team will cover the entry team as they prepare to breach the building
If the situation permits, the covering team should take up positions either side of the door. Meanwhile the clearing team should setup in such a way that one member is looking directly into the doorway while the other member is in a position to facilitate the opening of the door. Rarely will the conditions be so perfect as to allow the ‘ideal’ process to be setup with 100% accuracy, but in any such case, the priority of the covering team remains to protect the entry team.
If you’re tasked with opening the door, ensure that you give a clear indication of what you’re about to do - and confirm your buddy’s readiness before continuing. To keep it simple, stick to one word questions, with one word answers.
Ready?
Then wait for your team member to respond in the affirmative:
Yes!
Then open the door, and confirm the direction in which you are breaching:
Breaching right!
Pause at this moment for a few seconds before attempting to enter the building - this is to give the person looking into the doorway the chance to react to any contact on the other side. Stepping into the line of fire too soon could find you sandwiched between bullets coming from both directions. Once your team mate is happy that there is no contact immediately on the other side of the door, you’re clear to enter and the person covering the door way should follow you in.

Room Clearance
Room clearance is the only time where it’s considered good practice to have your weapon on fully automatic. The overall objective is to perform a 360 degree scan of the room, ensuring that every single corner is clear. Progress through the building at a walking pace, with your weapon continually raised. Stick to the wall that you declared at the moment of breaching, and try to avoid leaving the wall unless absolutely required. Once you’re satisfied that a room is clear, call out:
Clear!
Once you’ve cleared the initial entry room, and if it makes tactical sense to do so, the covering team should relocate to inside the initial room to cover any external doorways, staircases or windows while the clearing team continue with their tasking.
![]()
Building Clear
After a building has been fully cleared, mark it on the map in side channel with a black dot to indicate to other friendly forces that the building has been cleared:
